Tuesday, July 31, 2012

Guest Blogger: Revelle & Fifi

OUR TIGHTLY CURLY EXPERIMENT - SUMMER 2012!
WEEK 4, POST 4


Helloooo all in Kandy Land! For week four of our Tightly Curly Experiment, I hoped to recap what we’ve done by repeating/combining previous aspects to see if we could get the same or better results. Summary: Um, emphasis on could! You’ll see what I mean…and, for our bonus topic, to switch things up, I discuss making homemade product. OK, let’s break it down!
  1. (Same as last week), to keep her scalp eczema in check, I shampooed the scalp lightly with Head & Shoulders Eucalyptus Itchy Scalp Care, followed by a co-wash and detangling of the hair with the remaining Aussie Moist Conditioner from last week. Again, detangling was a breeze due to the amount of conditioner that was already in her hair.
  2. Fresh out of the shower, I decided to try a conditioner that I had on hand – Giovanni 50:50 Balanced Conditioner. Harrumph! I didn’t like this at all. Much too light and not at all moisturizing – AT ALL! But, I’m getting ahead of myself.
  1. OK. So, going back to week 1, a) I added coconut oil – because of the added moisturizing benefit. And going back to week 3, b) I used a holding agent to increase the likelihood of curl uniformity. This time I used homemade flaxseed gel, for in my experience it leaves little to no build-up - we did have build-up with the Kinky-Curly Curl Custard Gel. The goal - replicate week 1’s softness and moisture and week 3’s crisp curl definition, minus the gel build-up. (See this week’s bonus topic for how to make flaxseed gel).
Alright, to start, I added a gel/oil mixture (again, see bonus topic) to a section, then added the Giovanni conditioner, separated the section with a Denman brush, “smoothed” each separation created by the brush and moved onto the next section. Click here for a visual of this application from last week. Here are our results – oh and with close-ups, for a change J


OUR FINDINGS (click on pictures to enlargen)
  1. Although we achieved moisture and softness due to the coconut oil, we failed miserably to repeat last week’s great curl definition. Reason? Flaxseed gel doesn’t have enough hold. I still like it though as a styling tool. I believe in and have used flaxseed oil repeatedly in the past for hold in cornrows, box braids, etc… but it’s clearly not enough for curl definition. BUT, as expected zero build-up, meaning, no white flaky residue.
  2. By Day 3, her curls disappeared into frizz and fuzz, albeit moisturized, and to get back Day 2 definition, in and of itself a challenge, would have been difficult, so I just plaited the hair and called it a week And, that’s all she wrote!
Before I move on to the bonus topic, I just want to say that next week will be our last post. I will focus on summarizing what we’ve learnt, and we’ll do a technique comparison. A what? Ok, so since week 1, I’ve thought all along, “hmm this tightly curly method is just another way to do a wash n’ go, no?” So, yeah we’ll do a wash and go with product (not sure which one yet) and see if we can’t get the same results. Okay? OK!

**Bonus Topic: Homemade Flaxseed Gel**.

PROS: Flaxseed gel is super easy to make, provides hold for protective styling, leaves little to no (more like “no”, in my opinion) residue, and is completely natural and very cost effective.
CONS: Flaxseed gel gives only a light to medium hold and has a short shelf life – it has to be refrigerated and lasts only about 3 weeks.
So this is how it is made. I use Spectrum Organic Whole Premium Flaxseed. And I’ve had the same 15 oz. $7 bag of seeds since last year May – uh huh, cost effective!
- Measure out 2 oz., or 4 tablespoons, of flaxseeds
- Put 1 and ¼ cups of water (I don’t stress on it being bottled or distilled water, that’s just me) into a saucepan and bring to a rapid boil
- Add flaxseeds and keep stirring intermittently (5-7 minutes) until water starts to thicken and froths. When the water/gel is a consistency of runny syrup, strain and let cool in the refrigerator. As it cools the gel will set even more.
- I use a knee high stocking to strain the gel, and I keep the seeds in the stocking in a container in the freezer to use a second time. After the second production, I throw those seeds away.
- On average, this process takes me 15 minutes.


For the gel/oil mixture I mentioned earlier (which typically I would use for protective styling), I blended the gel created and about an equal amount of liquefied coconut oil, put this in an application bottle and refrigerated it. Whenever I want to use it over the next coming weeks, I will microwave it for about 30-40 seconds to get it back to a liquid state. And that’s it.


See you next week for the round up, and thanks for your comments and feedback!
- Révelle & Fifi

Sunday, July 22, 2012

Guest Blogger: Revelle & Fifi

OUR TIGHTLY CURLY EXPERIMENT - SUMMER 2012!
WEEK 3, POST 3

Hey Kandy Land Kurls readers! We are at three, count ‘em 1, 2, 3 weeks with our Tightly Curly Experiment. Summary: Best definition we’ve had so far, but with a catch (!) Plus, a brief exposé on shrinkage, love it or hate it – it’s here to stay! Shall we? Okay, let’s!

  1. To keep her scalp eczema in check, I shampooed the scalp lightly with Head & Shoulders Eucalyptus Itchy Scalp Care, followed by a co-wash and detangling of the hair with the remaining AVEENO NOURISH+ MOISTURIZE Conditioner from last week – might as well finish the bottle – and this worked well under the shower.

  1. Fresh out of the shower, I started the process by testing out another of Teri LaFlesh’s recommendationsAussie Moist Conditioner. To apply, I first tried Teri’s doodling process, but I just couldn’t get the hang of it, so I reverted to the smoothing process. Her whole head took longer this time – 3 hours. Here’s what I did, forgive the blurriness/overexposure of the pics!
Applied conditioner to wet section AND separated hair with a Denman brush


From root to tip, “smoothed” each separation created by the brush


Re-dampened next section as needed and repeated

Note: I only apply the conditioner about ¾ - 1 inch from the scalp, to prevent having her scalp flare up and itch from all that conditioner on it. I read that that happened to some people.


  1. Okay, so here is the catch I alluded to earlier. About half-way through, I realized that with the way her hair was already drying, we were going to end up with the same (somewhat) patchy results that we had last week. So, I changed course and decided to add some Kinky-Curly Curl Custard Gel, in addition to the AMC conditioner, to try for better curl definition – and the results we’re really quite great!


Upon completion, and even before her hair dried, I immediately started seeing a curl pattern lock-in in her fuzzy/frizzy areas.
OUR FINDINGS (click on pictures to enlargen)
  1. As I said last week, I was hoping to find a way to achieve better curl uniformity. And, I now know that adding some sort of holding agent (gel) is essential for us – we finally achieved Day-2 curls!


2. At night, I plaited and rolled up her hair, and it stayed like this for a couple days. On Day-5 and -6, I took these down, sprayed the hair with about 6 oz. of water, and smoothed this over with coconut oil. Temperature-wise, it has been really hot where we are, so I styled the hair off her neck.


  1. On Days 5 and 6, spraying the hair with water, as I did above, really helped the curls to come back to life. I did notice some gel build up on Day-5, but the addition of the water and coconut oil quickly remedied that.
  2. Overall, her hair still stays generally tangle free; and thanks to the abundance of conditioner, shampooing is the easiest it has ever been!
  3. My review of the Aussie Moist Conditioner? It’s okay. Funny thing is that I don’t find any of these conditioners to be very moisturizing. The only time I was blown away was week 1. BUT back then I used oils in the main conditioner application step and that is what I think made her hair feel so spectacularly soft and moisturized.

**Bonus Topic: Shrinkage**. 
As most of you know by now, curly hair – of any persuasion – shrinks. So, I just wanted to touch on the fact that with this method, um expect shrinkage :-D

Fifi’s hair tends to shrink in any instance, but normally it’s progressive, you know over a few days of spritzing and product adding etc. But with this TC method, it’s instantaneous. I don’t mind at all, because the goal here is curl definition. Normally, once the hair has been plaited for bedtime, the curls stretch out a bit by the next day, but then shrink up again with the re-application of water – it’s back and forth! And it is what it is – no fuss, no biggy! But curlies beware!


Thanks again for stopping by. I think we’re getting the hang of this and thus may have only one (maybe two) post(s) left in this experiment. I want to repeat/combine certain aspects that we have already done to see if we get the same or better results, as only then will I know if this is something we will ever do again. I might also try one more new conditioner. So, comment, leave questions/suggestions and do come back next week! - Révelle & Fifi

Wednesday, July 18, 2012

Twisted Bun Updo

For the past two days, I've been stumped on what to do on N's hair. I washed, moisturized, and banded, her hair over the weekend. Since, I had a bloggers version of a writers block lol. I decided to just grab a comb and begin freestyle parting. Surprisingly, it came out pretty nice.


I started by dividing her hair in half (ear to ear.) 
I began freestyle cornbraiding, on the back of the hair. I made some swirly kind of parts, and straight. With freestyle parting anything goes, be creative with your parting and just let it flow. 

Once, I reached the hair off of the scalp. I began to form a two strand twist. I twirled my finger and used holding gel to prevent the twists from unraveling.


Once the back was complete, it was time to work on the front. Again, I did not create a clear design. I created random braids, and two strand twist the ends. Remember, the key is focus on your parting. The neater the part, the more nicer the style will become. 

Finally, I placed all of the twists in a ponytail holder. I wrapped the twists to form a bun, and tucked the ends so that it won't show. I used 3 hair ties to secure the bun. 
Tip: You can also use a sock bun or filler to help the bun to look more fuller/thicker.

Simple & Stylish!

 I added the tiara, to show that this style is perfect not only for bigger girls/adults, but even the little ones.
I believe the tiara came with a barbie we brought awhile ago (ekk Im not sure lol )

                                                         
                         Our dog wanted to get some camera love too.              
                  
Products Used: 
(sorry I forgot to post this earlier, duhh Kandy)

Styling: Eco Styler Gel
Washed: Bee Mine Shampoo/Organix Coconut Milk Conditioner
Moisturized: Bee Mine Luscious & homemade shea butter mix.                                                                                                                                                                                                                                                                                                                                                                                                                                                 

Monday, July 16, 2012

Guest Blogger: Revelle & Fifi

OUR TIGHTLY CURLY EXPERIMENT - SUMMER 2012!
WEEK 2, POST 2

Hello again Kandy Land Kurls readers! We’re back with our second installment of our Tightly Curly Experiment. In short, the results are better, but we’re still not quite there yet. Oh and did someone say multiple hair types?!! More about that later!! Ok, let’s get to it.
  1. I shampooed again with Aubrey's Swimmer's Normalizing Shampoo, to remove the heavy salt and mineral build-up from the sea from our last day at the beach
  2. We then deep conditioned and de-tangled with Curl Rehab Moisturizing Hair Treatment, then rinsed the DC out. (same deal as last week)
  3. Fresh out of the shower, this is where we changed course. I divided her hair into 4 sections and applied a new combing conditioner, AVEENO NOURISH+ MOISTURIZE Conditioner. This is one that (tightly curly) Teri LaFlesh recommends.

  1. This week, I used Teri's smoothing application method exactly. To do Fifi’s whole head took about an hour and a half. Now, because I didn’t know until after the fact, that I would be blogging about our journey, again I have no pictures of our application – so, I will next time, promise and pinky swear!!! But the “smoothing application process” went something like this. To wet, not soaking, hair, I
- Applied conditioner to section
- Separated hair with a Denman brush
- From root to tip, “smoothed” each separation created by the brush
- Put that aside, re-dampened next section as needed, and repeated
Again, Teri's full application breakdown can be found here, with pictures.


OUR FINDINGS (click on pictures to enlargen)
  1. No oils were used this time in the conditioner application process, as I wanted to stay as close to Teri’s method as possible; she doesn’t use oils. I did, however, use coconut oil subsequently to help with moisture. See point #4 below….
  2. I learned my lesson and started in the morning – her hair still took all day to dry! (but it did so at a faster pace, because the hair was so separated from the smoothing – if this makes sense; compare her wet, un-separated curls from last week to see the difference)


  1. I didn’t like the AVEENO NOURISH+ MOISTURIZE Conditioner – too lightweight. By the end of Day-1, her hair felt dry, straw-like. I won’t be using this conditioner again – Fifi’s hair craves moisture, all – the – time!
  2. At bedtime, I loaded the hair with coconut oil, put in six big braids, and the next day whomp whomp….no Day-1 curl definition, BUT very separated and tangle-free. Still, the lack of moisture was annoying me, so before braiding the hair out, I sprayed her hairline and ends (the driest parts) with Cara B Moisturizing Hair Mist and smoothed this over with Cara B Leave-In Conditioner / Daily Moisturizer, braided out, and voila – soft, beach/bed hair!
  1. A day after this, she was back in a pool, so that was a wrap for this week’s trial!
NOTE: Bonus Topic: Multiple Hair Types. I have always known Fifi had multiple textures in her hair - you know looser curls here and there, tighter curls there and here, etc. But this process has really accentuated that. Look at the pictures below and you’ll see what I mean. In some spots, her hair takes on a frizzy/fuzzy appearance, and even though I was heavy handed with the conditioner in those spots, the curl definition was still lacking in those areas. Also, she has three different colors. The really light sections to the front left, behave differently from the front right, and from the rest of the head in general. The crown and back are darker and also do their own fuzzy, weird, non-curling thing….and so on and so on. Hopefully by the end of this experiment, I would have learned how to achieve better curl uniformity when she wears free hair. I’m not complaining, just saying! :-D


Thanks for stopping by, please comment, leave questions/suggestions and do come back next week. We’ll have a new bonus topic, be trying another combing conditioner, and we will be nowhere near water, so hopefully we can see the progression over a week, with visuals of course ;-)
- Révelle & Fifi

Friday, July 13, 2012

SpotLight: Sunshyne & Ayanna

1.) Your name and little one's name/nickname?

My name is Sunshyne and my daughter is Ayanna.


2.) What's your child's haircare routine?

 I use a method I call K.I.S.S. for her hair (Keep It Super Simple). I wash her hair weekly (styled or not) and alternate deep conditioning and hot oil treatments every other week. I keep her hair in protective styles during the week. She won't keep a bonnet or scarf on so she sleeps on a satin pillow case. I do apply a little oil to her ends prior to bed each night and moisturize daily. We clip ends about every 3 to 4 months. That's basically it for her routine.


3.) What products are you currently using?

After experimenting with so many different products, I created my own line. EPIC beYOUty. I use Sweet Body Icing moisturizer, Moisture Blend Oils, Arys Natural Gel, and Coco Moisture conditioner. Outside of my own line I use Herbal Essence Hello Hydration and Suave Naturals shampoo and conditioner from time to time.


4.) Do you use heat/chemicals on the child's hair?


No! No chemicals, no heat.


5.) How does your child feel about their hair?

She loves her hair! It's amazing to watch her play in her hair or in her baby dolls hair and how she references curls and afros. When I was little I had a negative image of "unruly" hair, everything was about trying to get your hair straighter. I make sure to pay attention to her pretty hair and so many people have gone natural that it's normal for her and she's excited by it. It's great!


6.) What was the worst hair tip you have received?

The worst hair tip I ever received was not to clip her ends. When she was first born I was just transitioning to natural and it took me a while to get used to having natural hair. As her hair grew I had to figure it all out and one of the tips I got was not to clip her ends, just continue to moisturize them. ^_^ (blank stare) Once damaged those ends don't repair themselves and they just continue to split. Bad tip.


7.) Do you cut/trim the hair? if so how often? 

Yes. I clip her ends just a little every 3 or 4 months for about a year now. Sometimes she hasn't needed it so I haven't cut it, but when I notice those little splits then sure, I'll clip them off. The goal is to keep her hair healthy.


8.) What is some hair advice you would like to share? 

Moisturize, protect and K.I.S.S. Those are my basic rules. Moisturize and protect for obvious reasons, but K.I.S.S. covers everything. I don't like to mix a lot of products, especially if they're chemically based, and I don't manipulate her hair constantly. That's really it.


Sunshyne you are doing a great job on Ayanna's hair! She is such a cutie, and I love your method of Keeping It Super Simple! Thanks for participating! 

-If you would like to see your child on KandyLandKurls please click on our tab "Participate" above, for more details.

Wednesday, July 11, 2012

How To Elongate Your Twist Outs

If you remember our post back in April (click here) when we created our first twist out. You may notice that her twist out, made her hair appear shorter.

Since then, I've been searching for a way to stretch her hair, without messing up the twist out. I stumbled upon Naptural85 video of how she created the best twist out ever. 


  If you are not subscribed to her channel you are missing out! So I decided to try the method of elongating a twist out on N.
 Here is our picture of the first twist out, VS the elongated twist out.  
Big difference right?! Here's how we did it.
 On Saturday night, I gave N a hot oil treatment using coconut oil and washed her hair. (Click on the "Our Regimen" tab above for details on our hair washing routine.)  Sunday I re-moisturized & sealed her hair, then banded her hair.
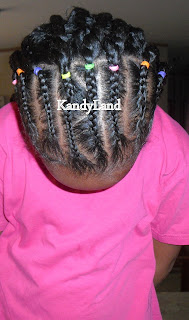
  Later on Sunday night, I removed the bands. I cornbraided the front of her hair going straight back, with one zig zag part, and added colorful rubberbands for flair lol. 
Instructions:
1.) Starting in the back of the hair, I grabbed a medium sized section and I lightly spritz it with our water/conditioner mix. Remember to spritz the hair lightly, you do not want to fully re-wet the hair or it may shrink back up.
2.) I added a small amount of Blended Beauty Happy Nappy Styles and a little amount of Eco Styler Gel together on the section of hair. I often mix styling products, to achieve definition but not crunchy.
3.) After adding the styling products, I began flat twisting the hair on her scalp. Once the flat twist began to lift from the scalp, I started to create a two strand twist.
 (The white residue is the product.)
Or if you do not know how to flat twist, you can create a regular two strand twist. But make sure to form the twist as close as you can to the root of the hair. The flat twist will help to add more definition to the twist out.
4.) Twirl, the ends of the two strand twist to prevent it from unraveling. Then immediately grab the twist, and form a bantu knot. This will stop the twist from shrinking up, while you continue to do steps (number #1-4) all over the back of the hair.
5.) Once you finished the final bantu knot, unravel one bantu knot, and stretch the bantu knot across the head to another side of the hair. Use a bobby pin (or clips) to pin the twist down. If this sounds complicated take a look at the photo below.
 (Removed Bantu Knot)
(Stretch it across the head & wrap it all around.) 6.) I continued pinning the twists around the head, until all of the twists were secured.
7.) I tied up her hair for the night, and as she slept her hair dried.
8.) In the morning, I removed her scarf and her hair was still damp (booo.) (But if your hair is dry skip this step.) I used our blow drier on the cool setting, to blowdry her hair. I did not want her hair to shrink up during this process. So I clipped the ends of each twist to help weigh it down.
9.) Once her twists were fully dry, I removed the clips/bobbypins. Then I rubbed some oil in my hands, and rubbed it all over the twists.
10.) I unraveled the twists very gently, to not mess up the twist out definition. And this is our results.....
(Random curls)
Stretched/Elongated Twist Out
Products Used (in order): 
Blended Beauty Soy Cream Shampoo
Organix Conditioner
Blended Beauty Happy Nappy Styles
Eco Styler Gel
Blended Beauty Oil 
  

Sunday, July 8, 2012

Guest Blogger: Revelle & Fifi

Hello Kandy Land Kurls readers!

My name is Révelle, and my little girl is nicknamed Fifi - 3 and a half years old. After reading about Teri Laflesh’s Tightly Curly Method (TCM), link below, I decided to use this summer to experiment with learning how to apply it to Fifi's curls. Annnnnnd, Kandy and I thought it would be a great idea to share my trials, errors and hopefully successes with you! So I'm guest blogging, even though I don't actually have a blog! Fun! :-)
First, here's some background on the TCM. The process is quite basic. It's nothing more than using store bought conditioners, for the most part, applying this generously to fresh/clean hair, setting your curl pattern using the abundance of conditioner in your hair, letting it dry and not washing it out until you're ready to wash your hair again. For an exact walk through of the step by step process, visit Teri's description here, and click on the "Tightly Curly Method" link. According to Teri, the TCM can be used on ALL curl types.
Our approach and hopes!

- I plan to experiment with the TCM for at least 1-2 months, or in other words all summer.
- I'll use different “combing conditioners” as recommendedby Teri, on her site, or based on ones that I think will work.
- Fifi's hair will be washed once a week - which is our normal summer wash routine, anyway.
- The plan is to let her wear her hair as freely as possible to avoid part-heavy hairstyles (her scalp is prone to sunburn)
- I aim to post once a week with our findings, product reviews, hairstyles, etc.
- Oh and consider yourself warned, posts will be picture-heavy, because, well you know, they’re supposed to be "worth a thousand words"!
Here we go!

OUR TIGHTLY CURLY EXPERIMENT -SUMMER 2012!
WEEK 1, POST 1 

  1. After taking down her previous hairstyle, we washed (with medicated shampoo, she has eczema), deep conditioned and de-tangled with Curl Rehab Moisturizing Hair Treatment. Then rinsed the DC out.
  2. With the hair dripping wet, and loosely following the TCM, I applied the three products you see below from left to right - Aussie Volume Conditioner, Darcy's Organic Coconut & Hibiscus Conditioning Oil and Nutiva Organic Coconut Oil
  3. I didn't follow Teri's application method exactly (strand by strand doodling and/or clumping small individual sections) because we were running out of daylight - we started this much too late in the afternoon. Instead, I sectioned off parts and applied the three product items, in the above order, by raking them through the hair with my fingers and then separating the hair with a Denman brush. I promise to take some pictures of how I apply the products in a later post.
  4. In the meantime, Teri's application breakdown can be found here.


OUR FINDINGS (with supporting pictures below) 


  1. This process has to be done in the morning to give the hair enough time to dry
  2. Using Aussie Volume Conditioner was a mistake; I meant to pick up the Aussie Moist Conditioner. BUT, it worked out. I liked the AVC. It left her hair soft, detangled with no build up and no crunchy feeling once the hair dried. I will try the AMC later on. I like the Darcy’s oil, no complaints, but probably won’t use it again, two oils are overkill, I think.
  3. Before starting this experiment, I read many reviews where people chose to use oils, like I did above, to help lock in moisture. Teri doesn't do this, but I thought it sounded like a good idea, therefore I did so.
  4. When Teri advises to not mess with the hair while it is drying, she is really right, we had fuzziness where I kept "fixing" the wet curls.
  5. A day later, this method held up well at the beach/pool. (Once she got her hair wet, I left it open - shocking (!) I know. BUT because her hair was heavy with conditioner, it never tangled even when she went into the pool (pulled back into a ponytail) and later, shampooed - still, little to no tangles!
  6. After swimming, we washed with Aubrey's Swimmer's Normalizing Shampoo, added more AVC, lots of coconut oil, blew the hair dry, on a medium setting, so that it was just damp, not dripping wet, separated it into six big twists, and off to bed. By the way, this was our first time using "heat", although the setting was more warm than hot. We were at the beach for a few days, so this 6th step was repeated often.
NOTE: As we went straight to the beach the day after applying the TCM, we didn’t get a chance to test it over a week. We’ll do that in a subsequent post, and see how long one application of conditioner holds up over a week. The beach pictures are not meant to demonstrate curl definition, they are just to show that we experienced little to no tangling with free wet hair. Ordinarily, her hair tangles like the dickens once wet – but not this time!